How to Draw a Square
There are various ways to draw a square in technical drawing:
Constructing a Square Inscribed in a Circle
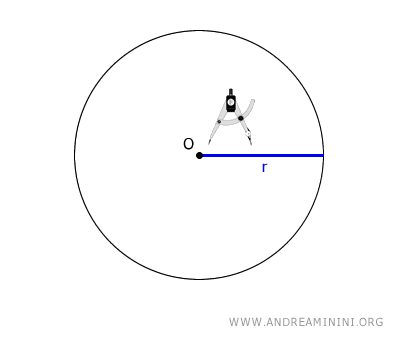
Begin by drawing a circle with its center at point O and a radius of length r.
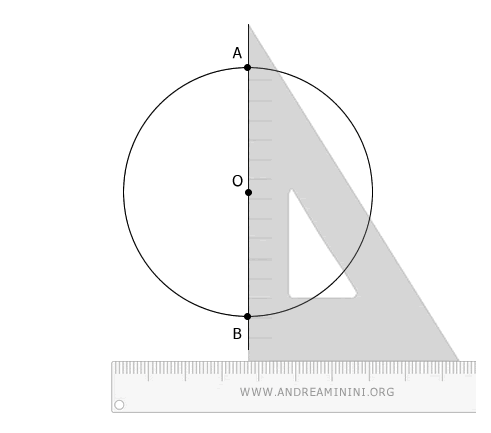
Align your ruler horizontally on the paper.
Next, using a 90° set square along the ruler, draw the diagonal AB through the center point O of the circle.
Place the compass at point A and, with a slightly larger radius, draw a light arc.
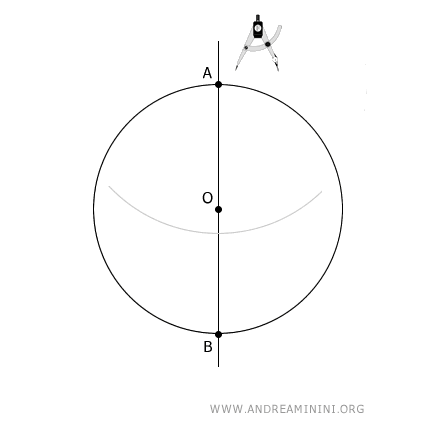
Now, position the compass at point B.
Draw another arc with the same radius, so that it intersects with the first one.

Draw a line through the intersection points of the arcs.
This creates the diagonal CD, which is perpendicular to diagonal AB.
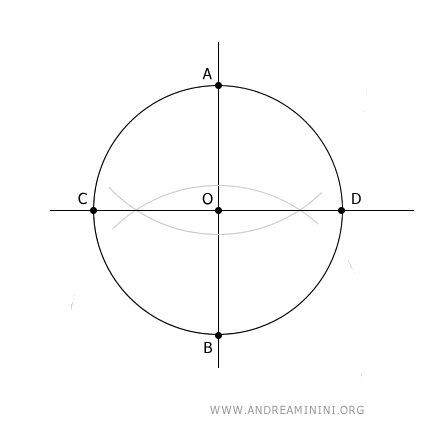
Finally, connect the points A, B, C, and D with line segments to form the sides of the square.
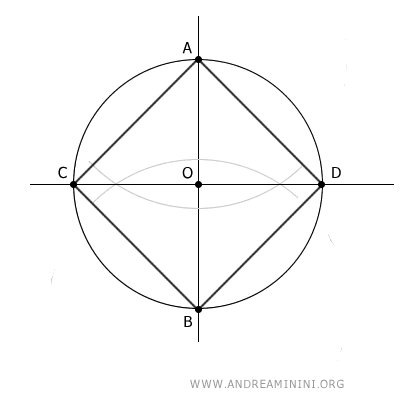
The end result is a square perfectly inscribed within the circle.
And that’s how it’s done.
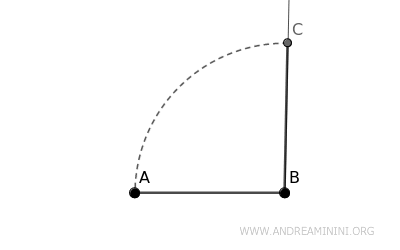
Constructing a Square Given One Side
In this method, we start with the length of one side of the square.
First, I draw a segment AB—let’s say the horizontal base of the square, though any segment would work just as well.

Next, I construct a perpendicular line at one end of segment AB—let’s choose point B.

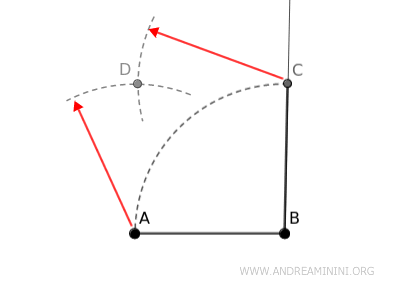
Using a compass, I set the radius to match the length of AB.
With the compass centered at B, I mark point C—the next vertex of the square.
Now, I can repeat this process at the other end of the segment to locate vertex D.
Alternatively, I center the compass at C, keeping the radius equal to AB, and draw an arc.
Then, I place the compass at A with the same radius and draw another arc. The two arcs intersect at point D.
Finally, I connect A to C and A to D to complete the square by drawing segments AC and CD.
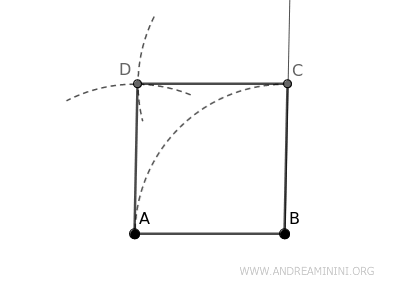
The final result is a perfectly constructed square.
And that’s all there is to it!